SETTINGS :
GENERAL SETTINGS
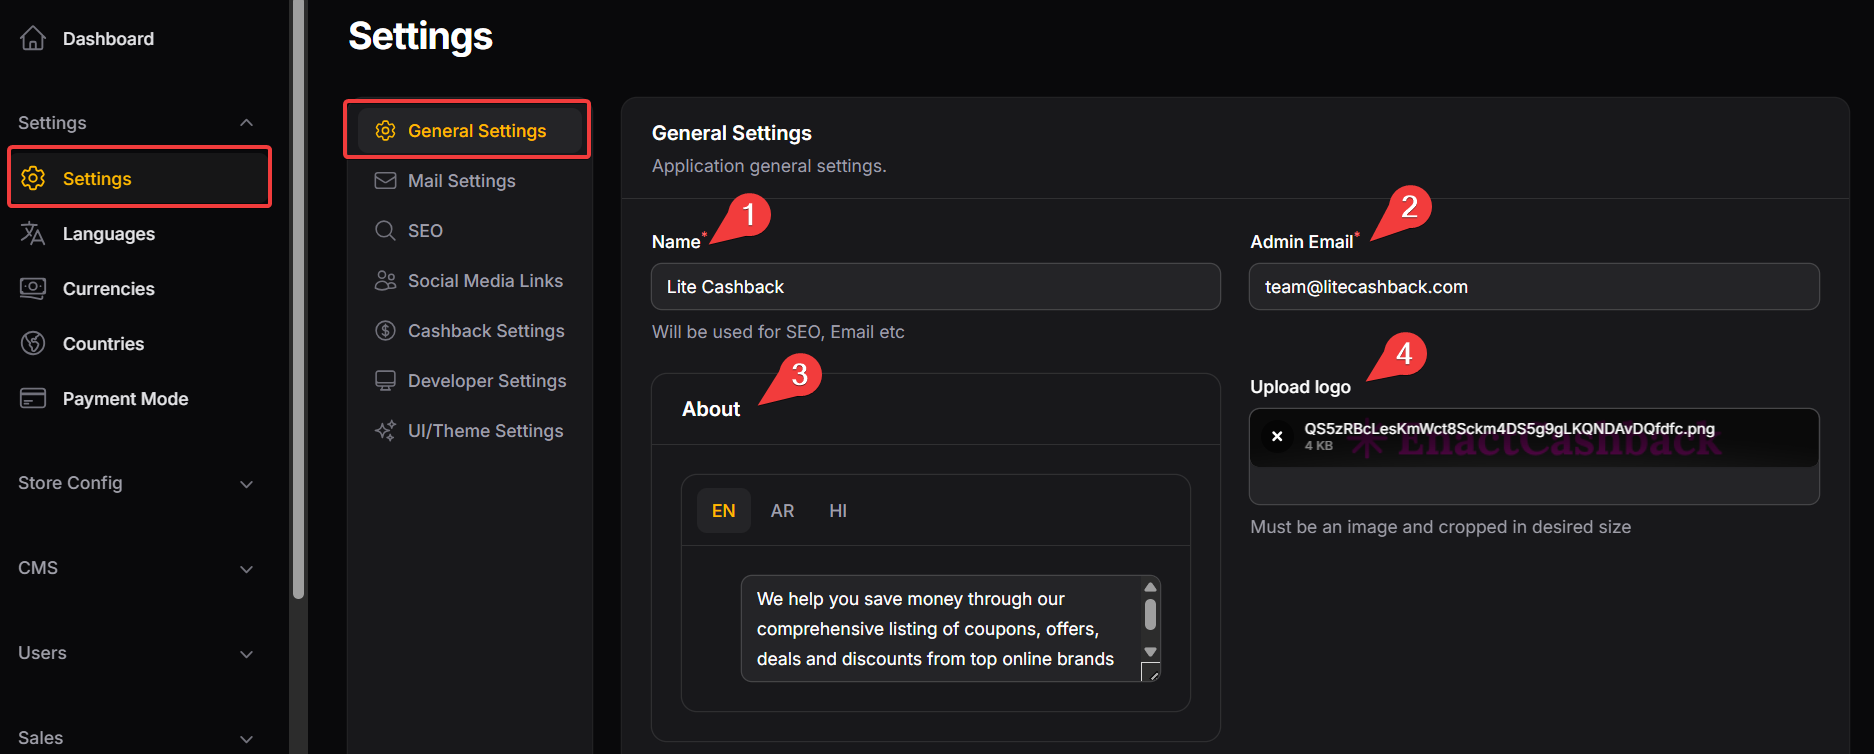
Name: Defines the platform's name, used for SEO and email configurations.
Admin Email: Enter the email address of the administrator for communication and alerts.
About: This section serves as the primary brand summary for your platform.
-
Upload Logo: Uploads the platform’s logo, which should be properly cropped to the required size and format.
Size should be: 215/42 px
-
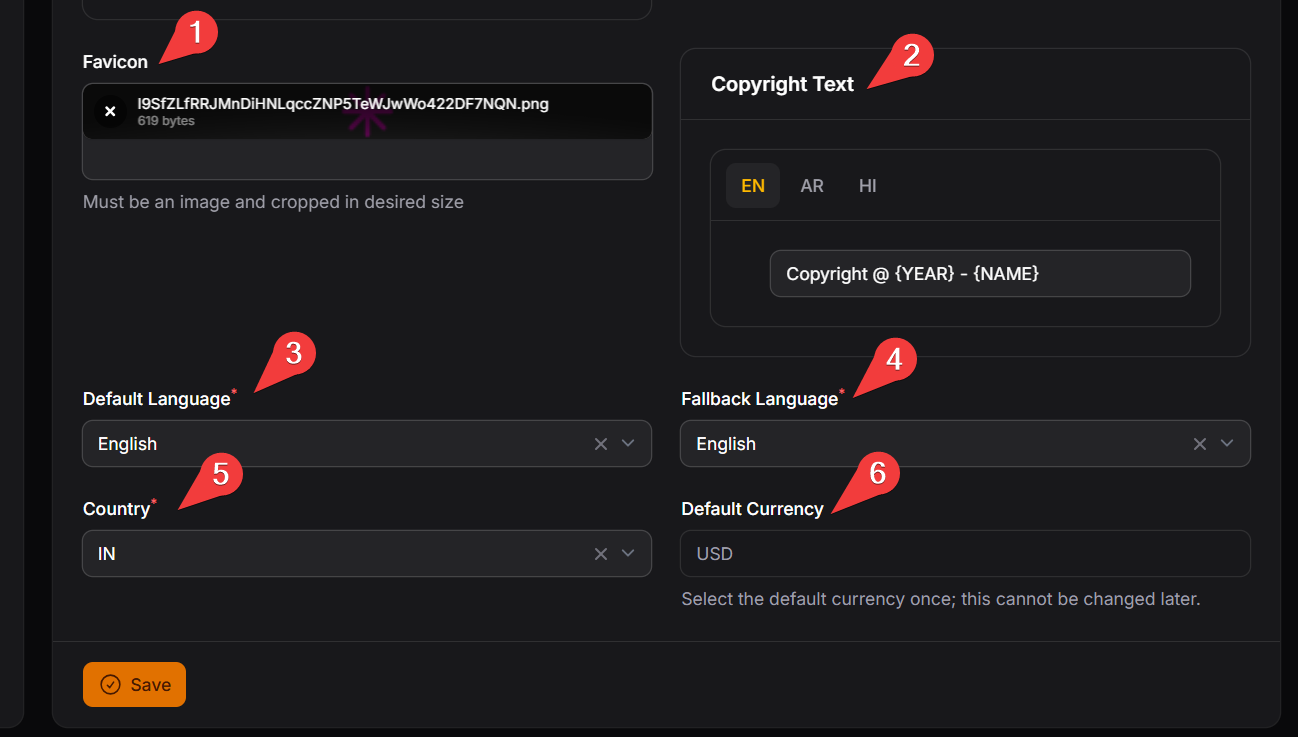
Favicon: Uploads the favicon for the website, appearing in browser tabs and bookmarks. The file must be an image and cropped to size.
Size should be: 512/512 px
Copyright Text: Customizes the copyright text that appears on the website footer.
Default Language: Allows selection of the platform's default language, with options to choose.
Fallback Language: Fallback language means the default language the system uses when a translation is not available in the selected language.
Country: Choose the primary country for your platform.
Default Currency: Select the default currency once which cannot be changed later.
MAIL SETTINGS
This section controls how system emails are sent from the application, such as sign-up emails, password resets, notifications, and alerts.
Common Providers for Email Credentials:
Mailtrap – For testing and staging environments
Gmail SMTP – For small-scale setups
SendGrid / Amazon SES – For production and high-volume emails
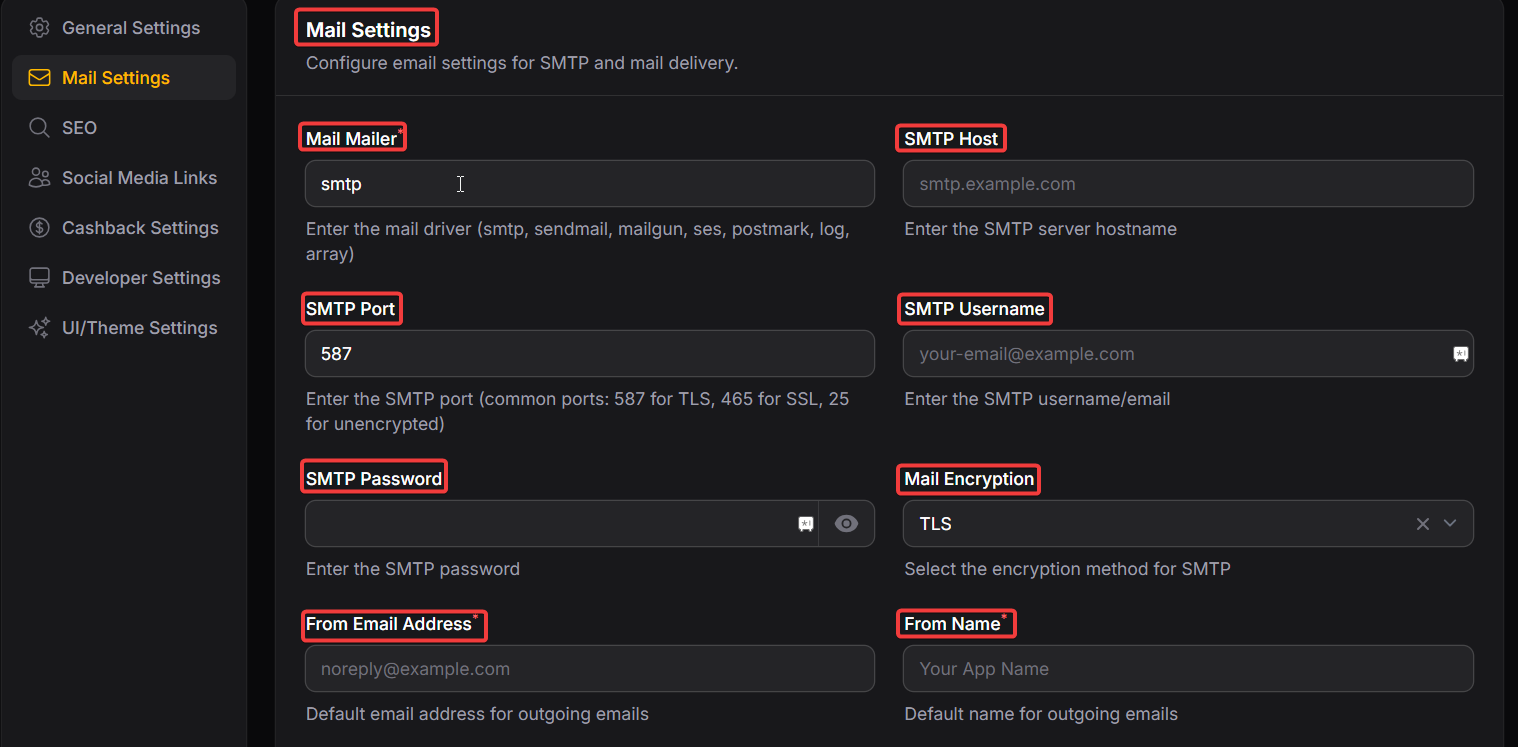
Mail Mailer: Defines the protocol for sending emails (e.g., SMTP, IMAP, POP3). You will need to configure the mailer depending on your email service.
SMTP Host: The server address provided by your email service provider (e.g., smtp.gmail.com). This is required for email sending.
SMTP Port: The port number that the email service uses for sending emails. It will depend on your mail service provider (e.g., 587 for Gmail).
SMTP Username: The email address or username used to authenticate the email sending service.
SMTP Password: The password for the email account that will be used to send emails through the service.
Mail Encryption: Specifies the encryption type used by the email service to secure the communication, usually either SSL or TLS.
Mail From Address: Specifies the email address that will appear as the sender in the recipient's inbox. This is the address from which all emails will be sent.
Mail From Name: Defines the name that will appear as the sender in the email to make it clear who is sending the email.
SEO
This section is used to configure default SEO metadata for Stores, Categories, Coupons, and other pages. It helps improve search engine visibility and ensures consistent SEO structure across the site.
Purpose
Defines default meta title, meta description, and heading (H1/H2) formats.
These values are dynamically generated using macros based on the page content.
SEO Macros
Macros are placeholders that are automatically replaced with actual entity data on the frontend.
#NAME – Name of the entity (e.g., store or category name)
#TITLE – Title of the entity (e.g., coupon title)
#CBRATE – Cashback text (e.g., “Up to 10% Cashback”)
#AMOUNT – Cashback amount value
#RATETYPE – Cashback type (Flat / Upto)
#CURRENTMONTH – Current month name (e.g., January)
#CURRENTYEAR – Current year (e.g., 2026)
#MONTH – Month with year (e.g., January 2026)
#DATE – Current date (e.g., 30/01/2026)
These macros allow SEO content to stay updated automatically without manual edits.
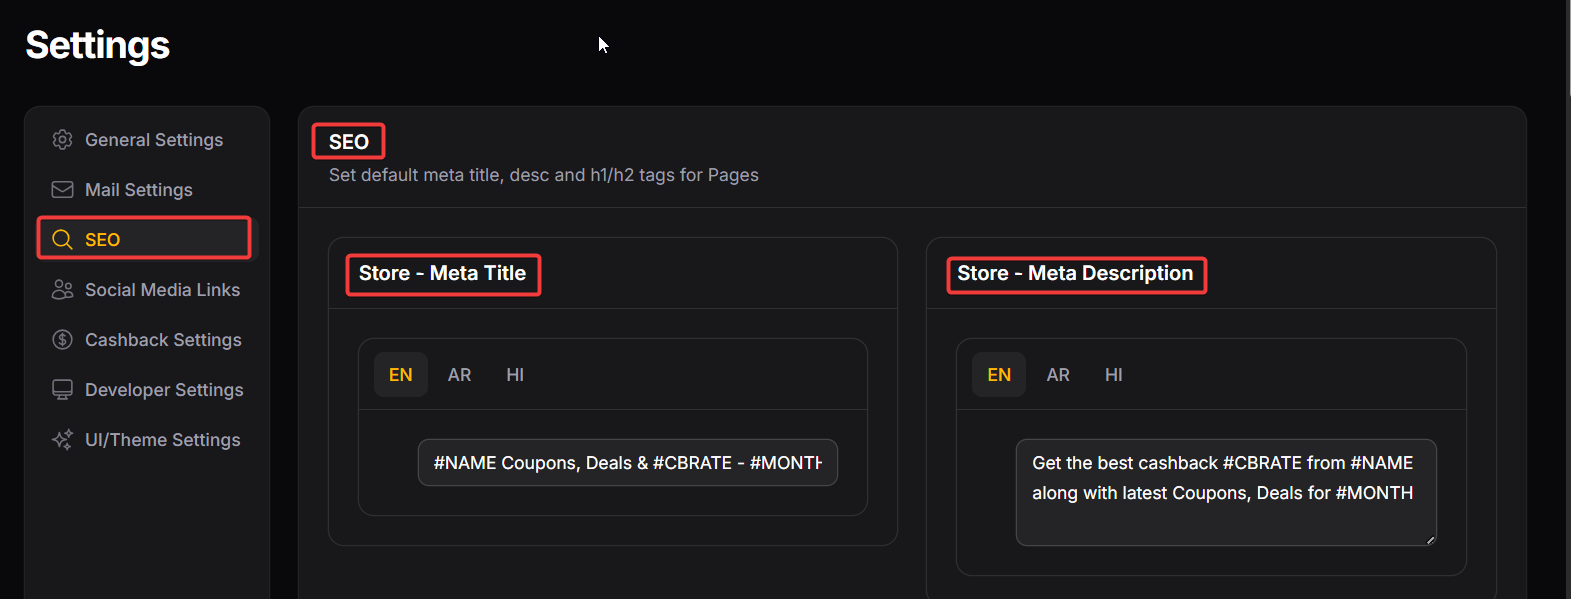
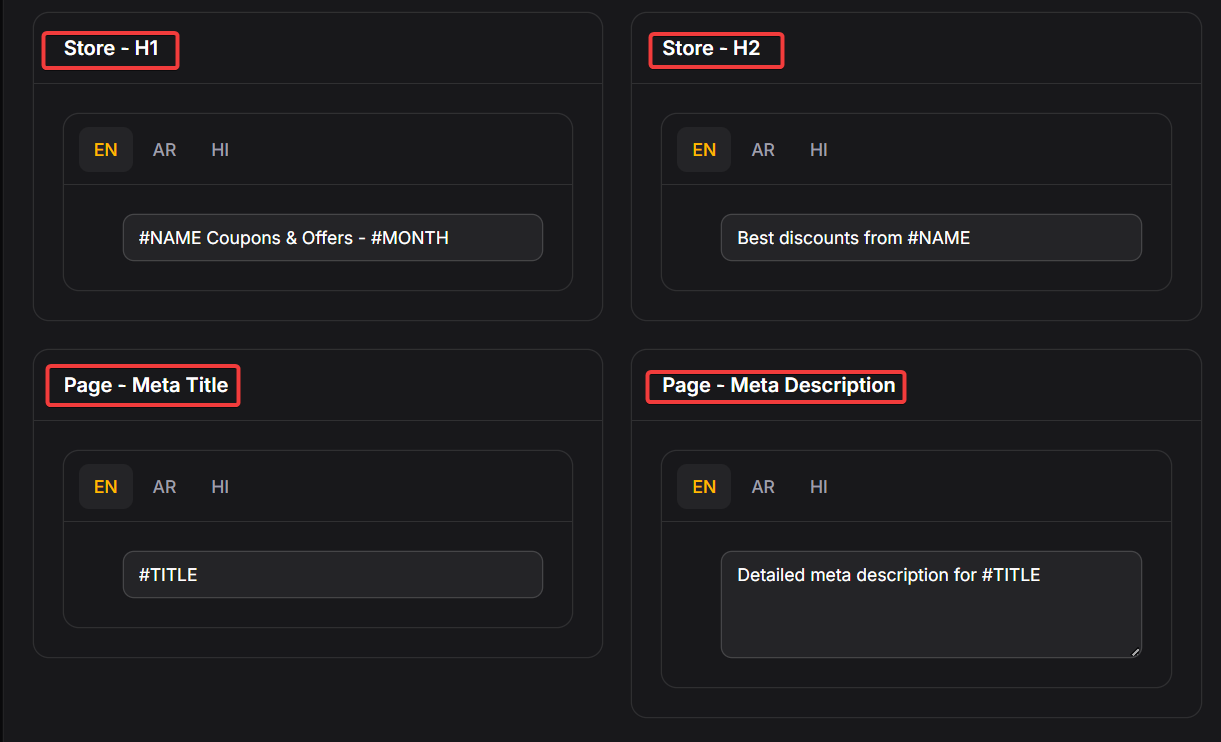
--> Store - Meta Title: Customizes the page title dynamically using macros like store name, cashback rate, and current month.
--> Store - Meta Description: Customizes the page description with dynamic data, including store name and cashback rate.
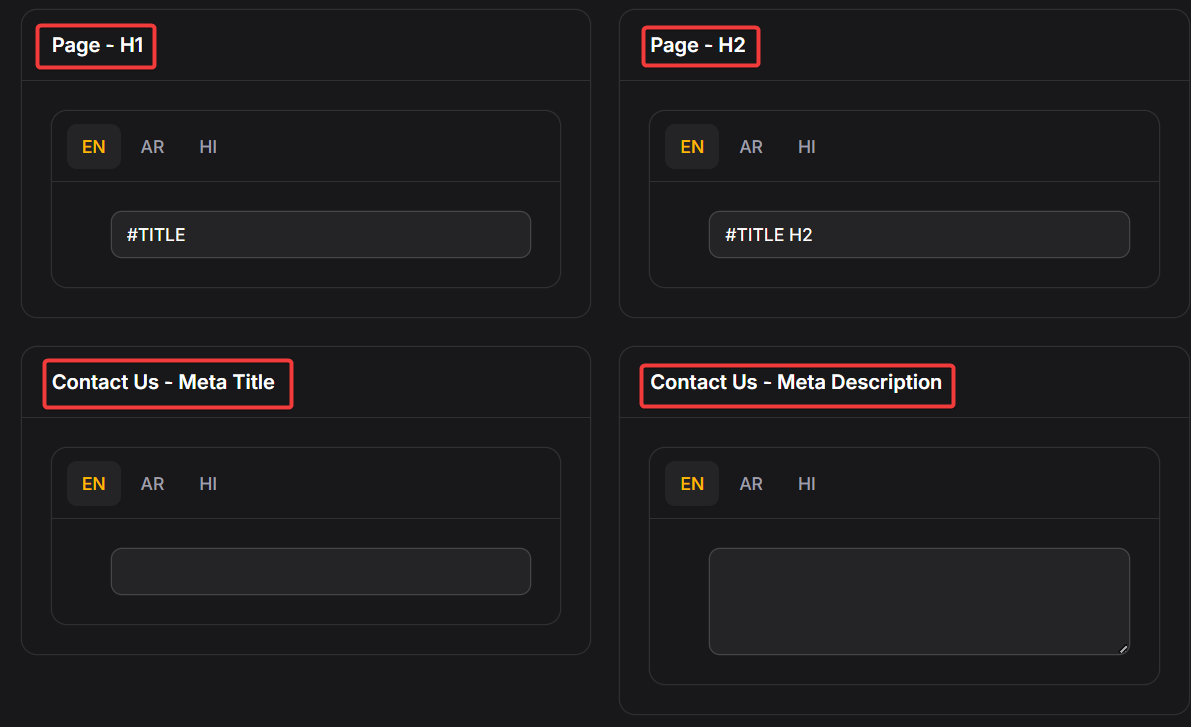
--> Store - h1: Sets the main heading of the store's page using the store’s name dynamically.
--> Store - h2: Defines a subheading for the store's page, often including key information like discounts or store name.
--> Page - Meta Title: Used for setting the meta title for the page.
--> Page - Meta Description: Defines the meta description for the page.
--> Page - h1:The primary heading (h1) for the page.
--> Page - h2: This is the secondary heading for the page, typically shown as the subheading.
--> Contact-Us - Meta Title: Used for setting the meta title for the Contact-Us page.
--> Contact-Us - Meta Description: Defines the meta description for the Contact-Us page.
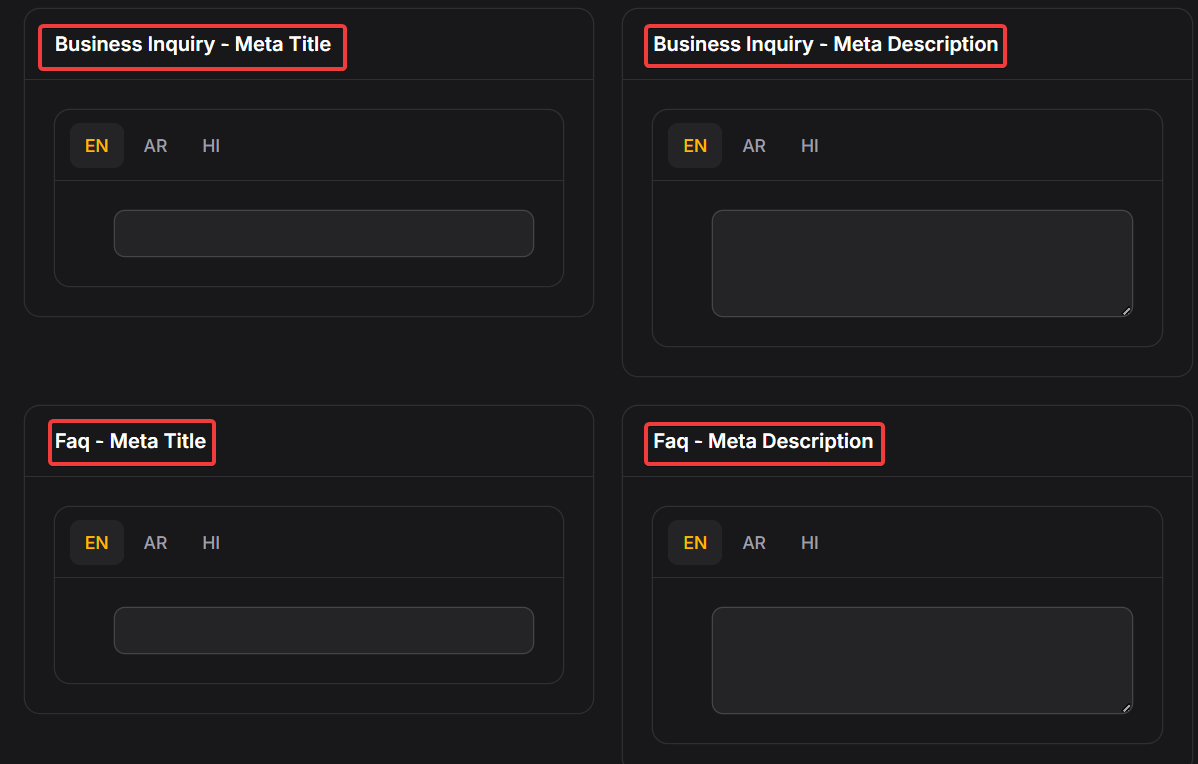
--> Business Inquiry - Meta Title: Used for setting the meta title for the Business Inquiry page.
--> Business Inquiry - Meta Description: Defines the meta description for the Business Inquiry page.
--> FAQ - Meta Title: Used for setting the meta title for the FAQ page.
--> FAQ - Meta Description: Defines the meta description for the FAQ page.
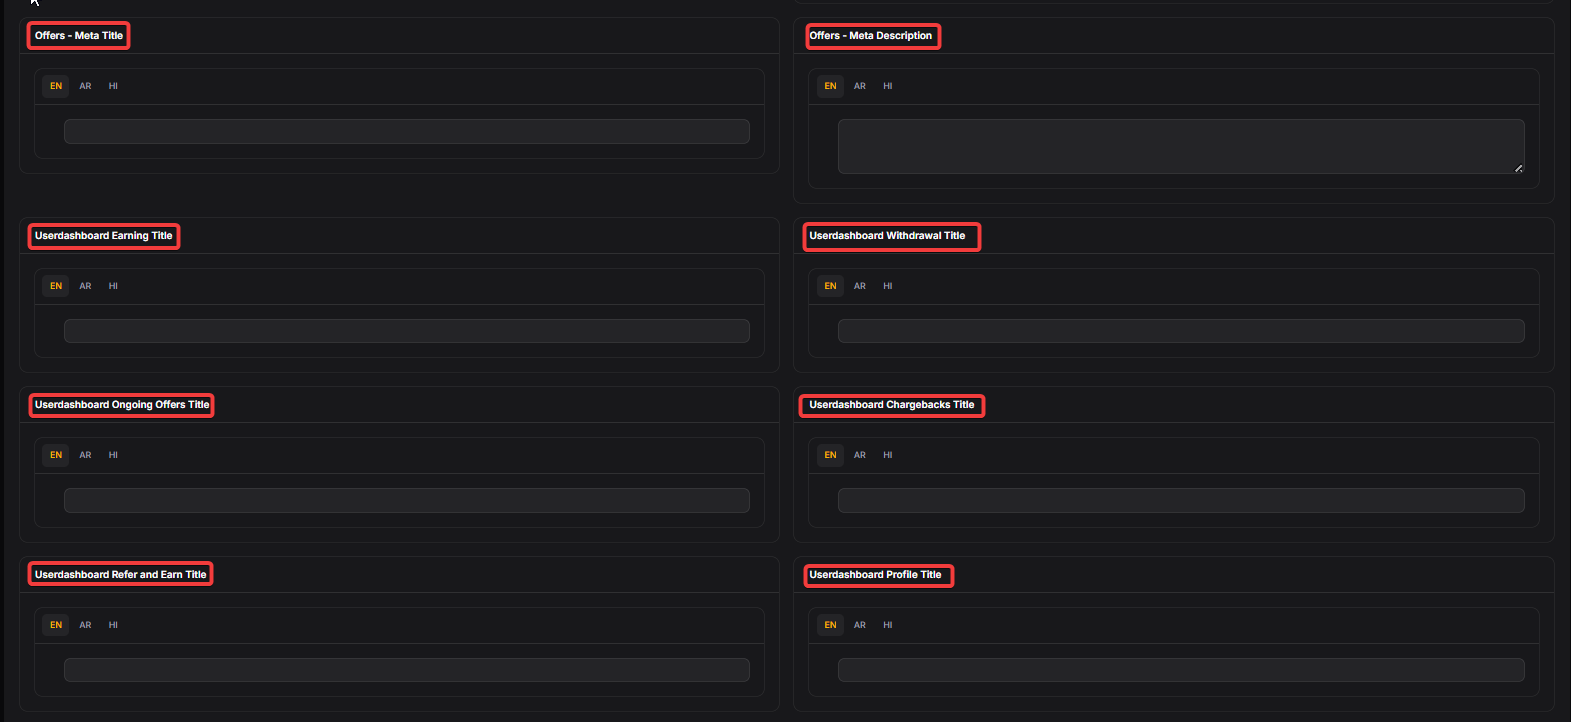
--> Offers - Meta Title: Used for setting the meta title for the Offers.
--> Offers - Meta Description: Defines the meta description for the Offers.
--> User dashboard Earning Title: Used for setting the earning title for the user dashboard.
--> User dashboard Withdrawal Title: Defines the withdrawal title for the user dashboard.
--> User dashboard Ongoing Offers Title: Used for setting the ongoing offers title for the user dashboard.
--> User dashboard Chargebacks Title: Defines the chargebacks title for the user dashboard.
--> User dashboard Refer and Earn Title: Used for setting the refer and earn title for the user dashboard.
--> User dashboard Profile Title: Defines the profile title for the user dashboard.
Social Media Links
Adding social media links to your website helps users easily find and follow your brand on platforms like Instagram, Facebook, LinkedIn, etc. This increases your online presence, builds trust, and keeps users engaged with your content and updates.
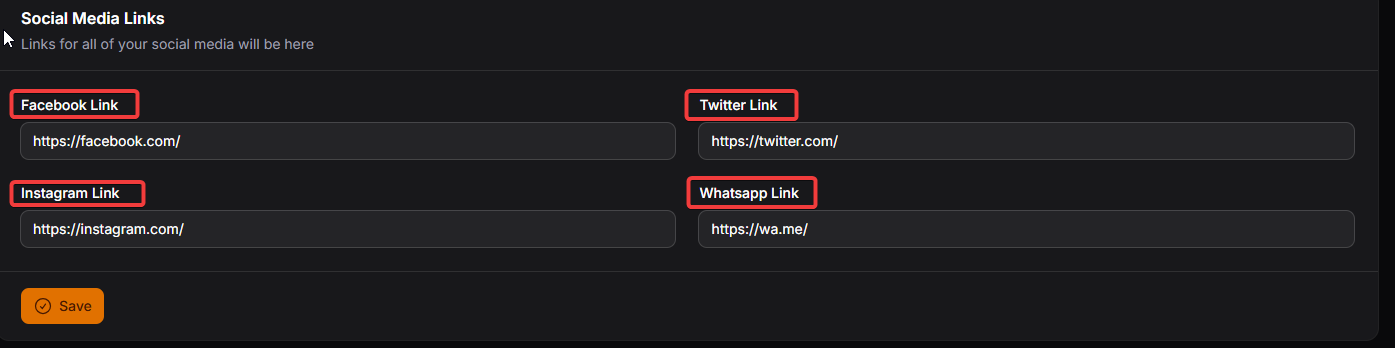
--> Facebook Link: Enter your official Facebook profile or page URL here.
--> Twitter Link: Provide the link to your official Twitter profile.
--> Instagram Link: Input your official Instagram profile link.
--> WhatsApp Link: Enter the link to your WhatsApp profile or group that users can click to initiate a chat.
Cashback Settings
This section controls global cashback behaviour across the platform.
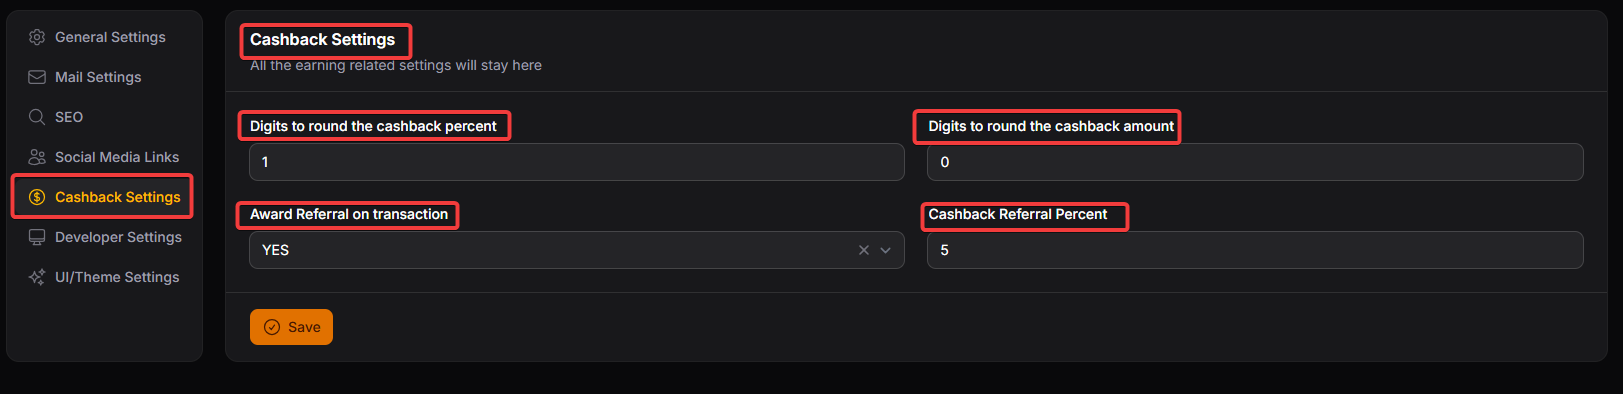
Digits to round the cashback percent: Enter the no. of digits which are needed to round off cashback percent.
Digits to round the cashback amount: Enter the no. of digits which are needed to round off cashback amount.
Award Referral on Transaction: Enable or disable referral rewards for transactions. When enabled, users will earn referral rewards on successful transactions made through their referral links.
Cashback Referral Percent: Set the percentage of cashback users can earn from referring others. This determines how much users earn for each successful referral.
DEVELOPER SETTINGS
This section is used for advanced configuration and technical customization of the platform.
It is mainly intended for developers or technical administrators.
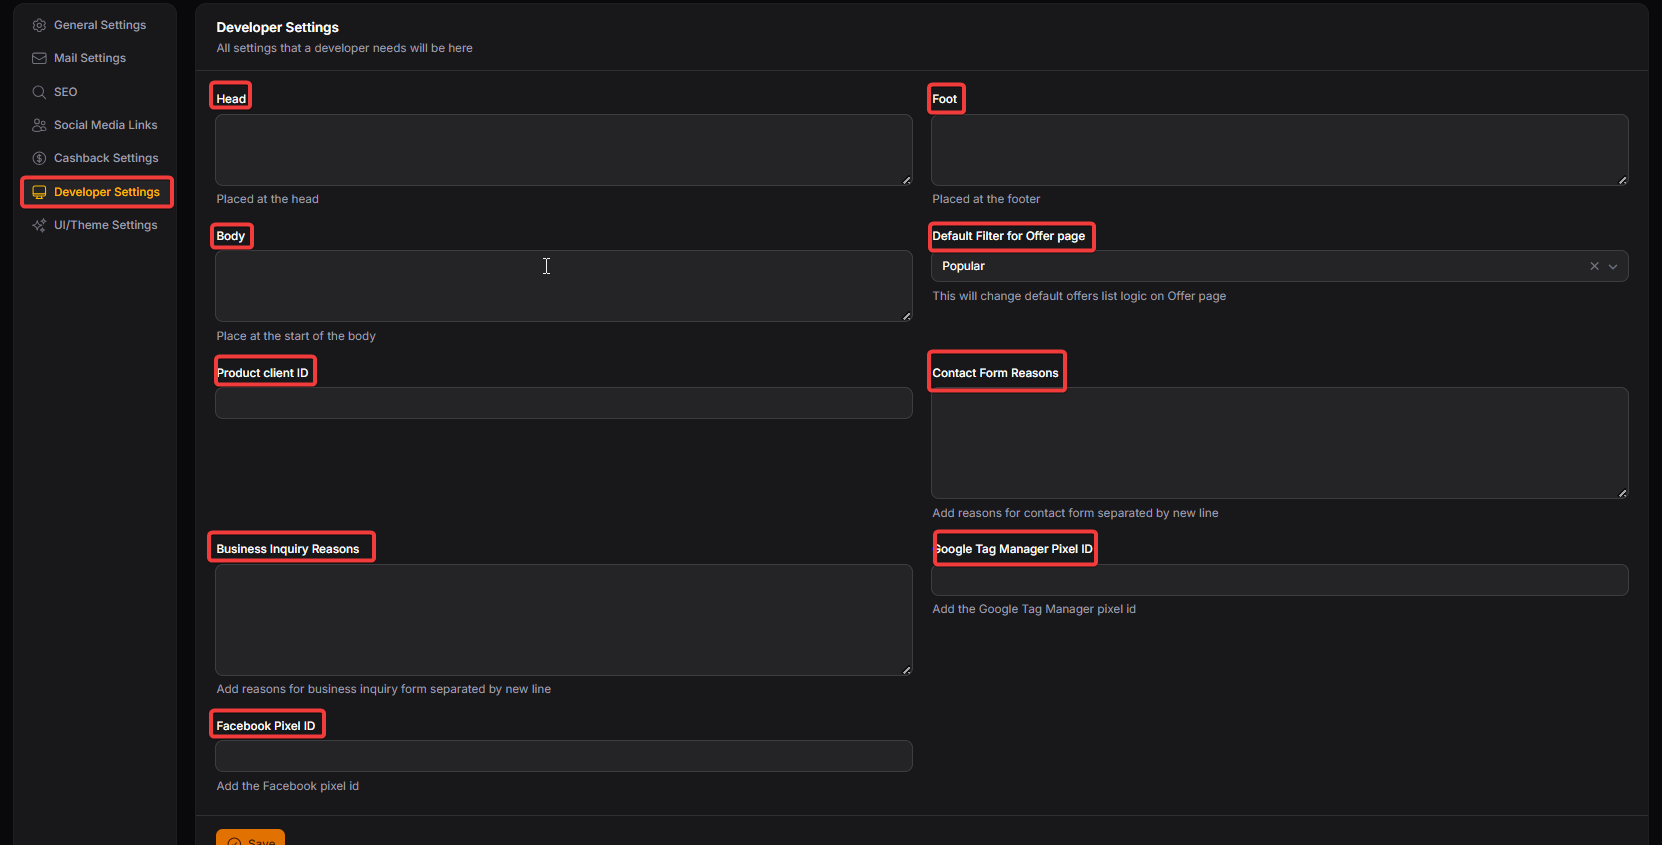
Head: Allows adding custom code that loads inside the <head> section of the website. Typically used for custom CSS, meta tags, or third-party scripts that must load early.
-
Foot : Used to add scripts that load in the footer of the website.
Commonly used for analytics scripts or JavaScript that should load after page content.
-
Body :Allows inserting code at the start of the <body> tag.
Used for integrations that require early body-level execution.
Default Filter for Offer page: This will change default offers list logic on Offer page.
Product client ID: Enter the Product Client ID.
Contact Form Reasons : Add reasons for contact form separated by new line.
Business Inquiry Reasons : Add reasons for business inquiry form separated by new line.
Google Tag Manager Pixel ID : Add the Google Tag Manager pixel id.
Facebook Pixel ID : Add the Facebook pixel id.
UI/Theme Settings
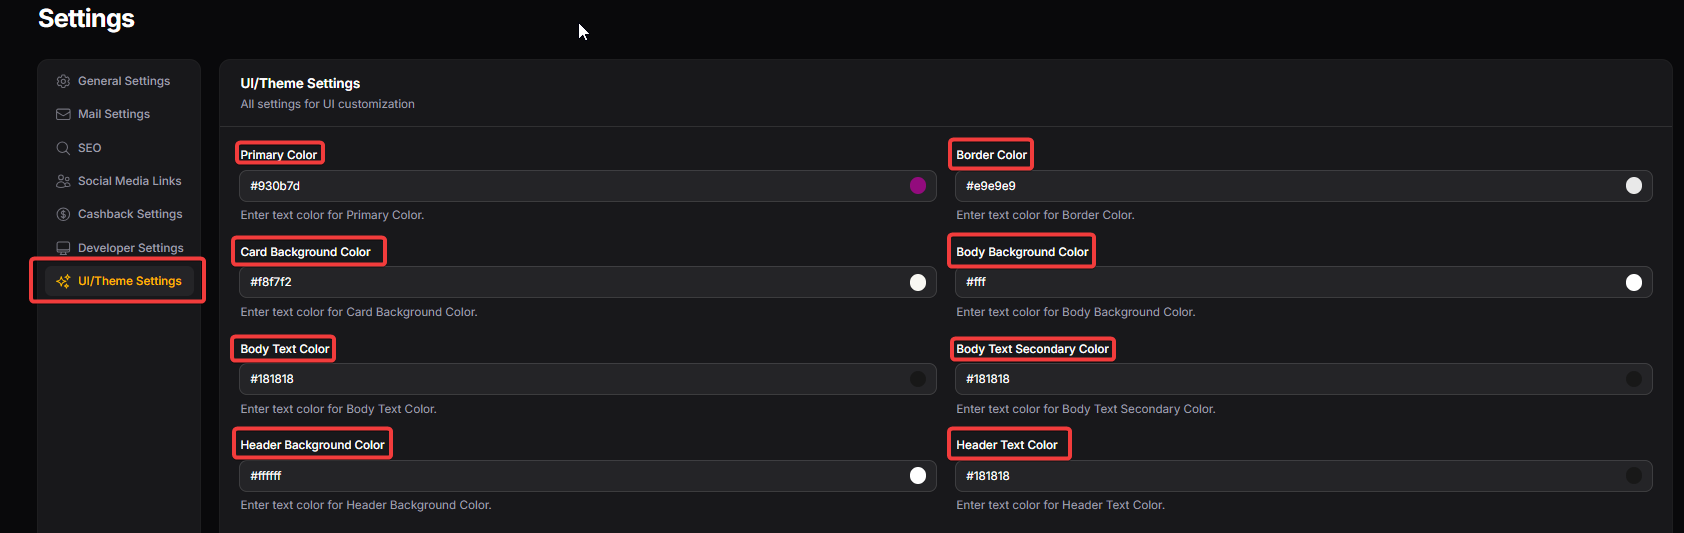
Primary Colour: This is the main colour used throughout the website or app, typically for key elements like buttons.
Border Colour: This defines the colour of borders around elements such as buttons, cards, or containers.
Card Background Colour: The colour of the background for the card of the website.
Body Background Colour: The colour of the background for the main content area of the website.
Body Text Colour : Enter text colour for Body Text Colour.
Body Text Secondary Colour : Enter text colour for Body Text Secondary Colour.
Header Background Colour: Enter text colour for Header Background Colour.
Header Text Colour : Enter text colour for Header Text Colour.
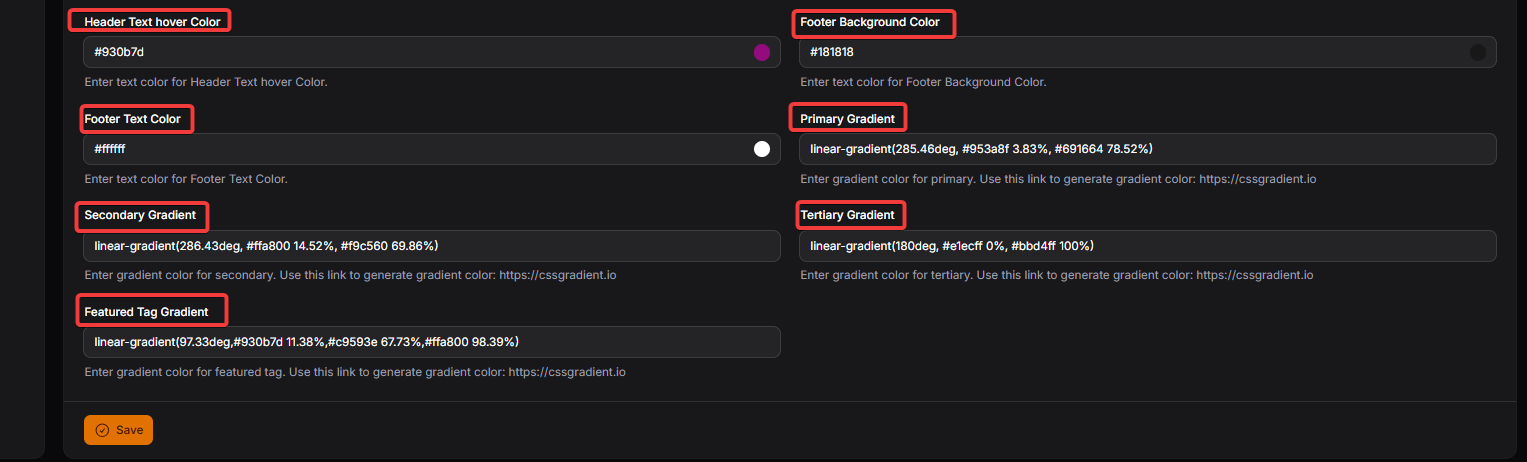
Header Text hover Colour : Enter text colour for Header Text hover Colour.
Footer Background Colour : Enter text colour for Footer Background Colour.
Footer Text Colour : Enter text colour for Footer Text Colour.
Primary Gradient : Enter gradient colour for primary. Use this link to generate gradient colour: https://cssgradient.io.
Secondary Gradient : Enter gradient colour for secondary. Use this link to generate gradient colour: https://cssgradient.io
Tertiary Gradient : Enter gradient colour for tertiary. Use this link to generate gradient colour: https://cssgradient.io
Featured Tag Gradient : Enter gradient colour for featured tag. Use this link to generate gradient colour: https://cssgradient.io
LANGUAGES:
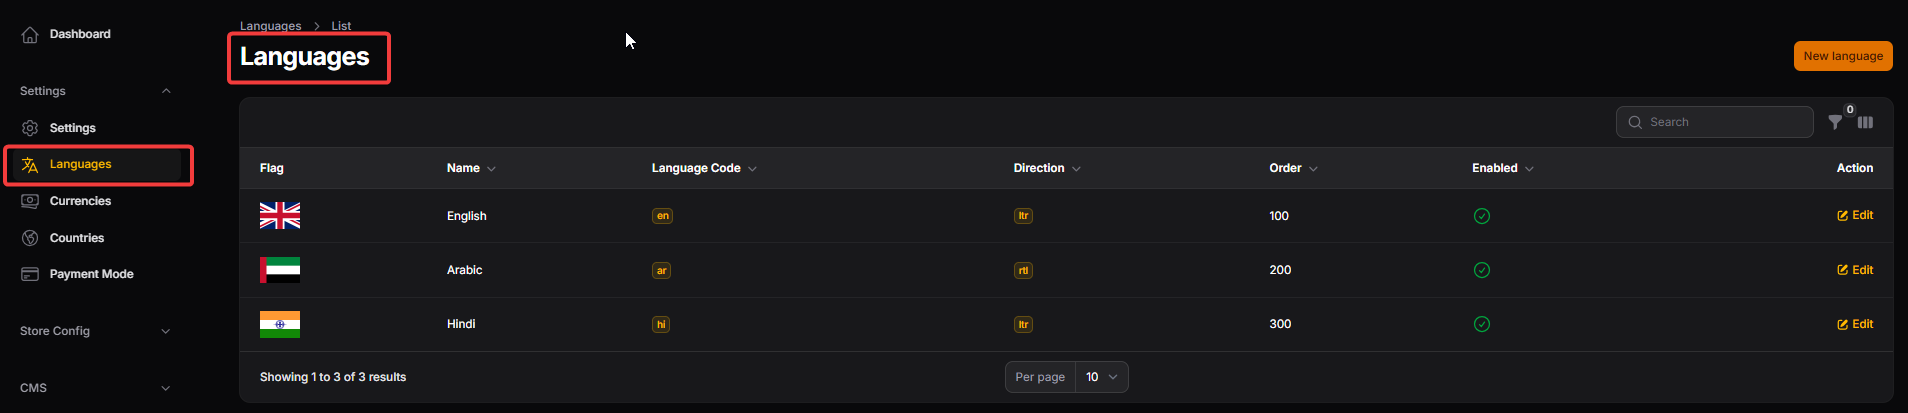
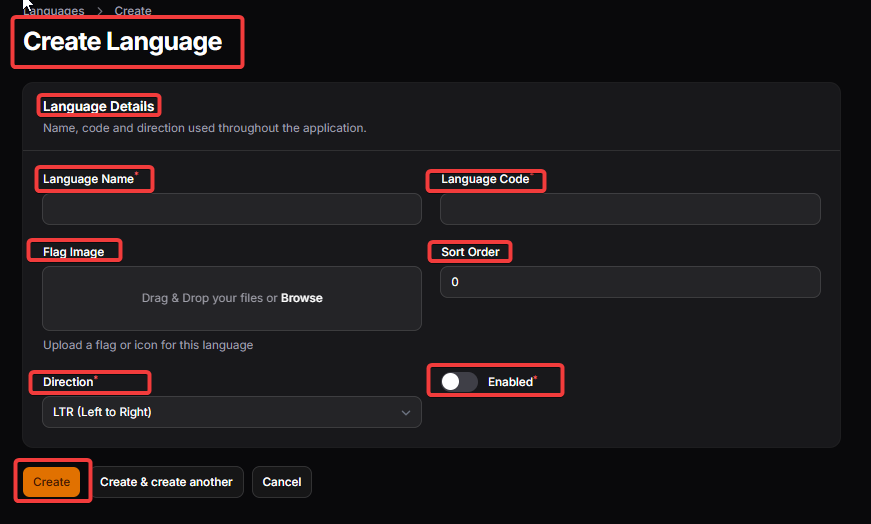
Language Name: Provide a language name in which site content can be read.
Language Code : Provide a code for language name in which site content can be read.
Flag Image : Upload a flag or icon for this language.
Sort Order : Enter a sort order for language preference 0(top).
Direction : Select direction from LTR (Left to Right) & RTL (Right to Left).
Currencies:

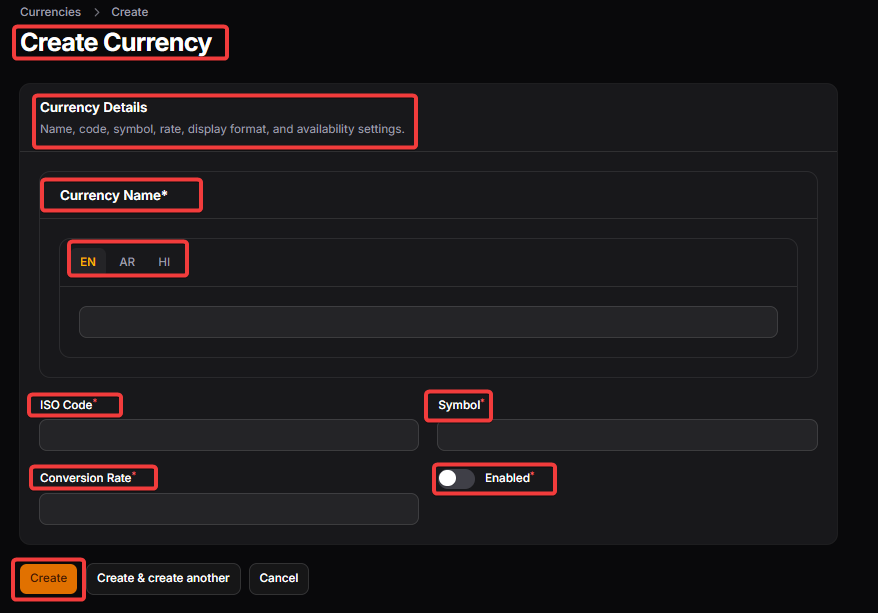
Currency Name : It is the full name of the currency, such as “US Dollar” or “Indian Rupee.” It is mainly used in the admin panel and helps administrators easily identify and manage different currencies. (In all mentioned languages)
ISO Code : It is the internationally recognized three-letter currency code like USD, INR, or EUR. It is used internally by the system and in integrations to correctly identify the currency type.
Symbol: It is the sign used to represent the currency, such as $, ₹, or €. This symbol is shown to users next to prices and cashback amounts on the website.
A conversion rate : It is a ratio between two currencies, most commonly used in foreign exchange markets, which designates how much of one currency is needed to exchange for the equivalent value of another currency. Conversion rates fluctuate regularly for all currencies traded in forex markets.
Enabled : It controls whether this currency is available for use on the website. If disabled, users will not be able to select or view prices in this currency.
Countries:

Countries > Create Country
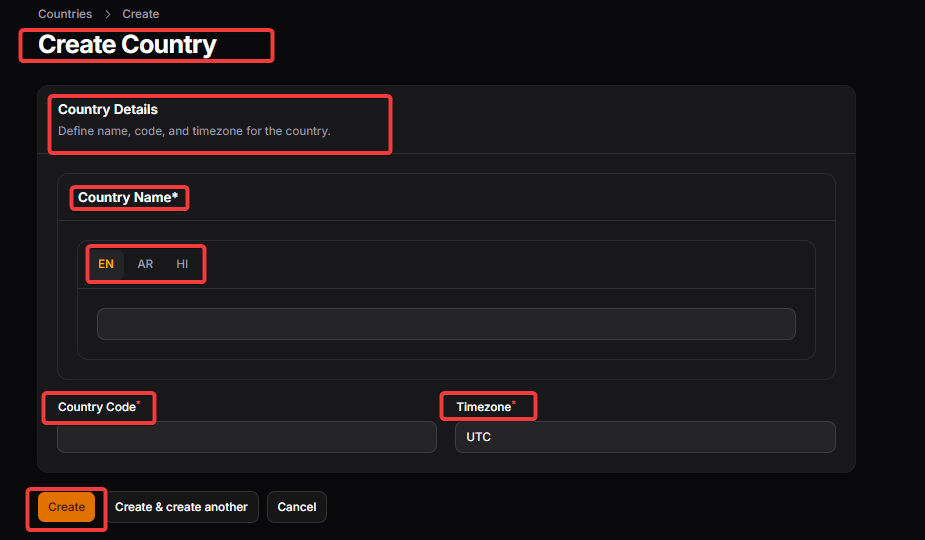
Country Name: It is the official name of the country. It helps users and administrators select the correct country during registration and profile updates.
Country Code: It is the two-letter country code (ISO Alpha-2), such as IN, US, or AF. It is used internally by the system for country identification, integrations, and data mapping.
Timezone: Enter timezone for the particular country.
Payment Modes (Payout Method):
Payment Modes define how users can withdraw their confirmed cashback or rewards from the platform. This section controls which payout options are available, the minimum withdrawal limits, and what details users must provide to receive payments.
It ensures payouts are processed securely, correctly formatted, and aligned with business rules (like minimum thresholds and eligibility).

Payout Method > New Payout Mehod
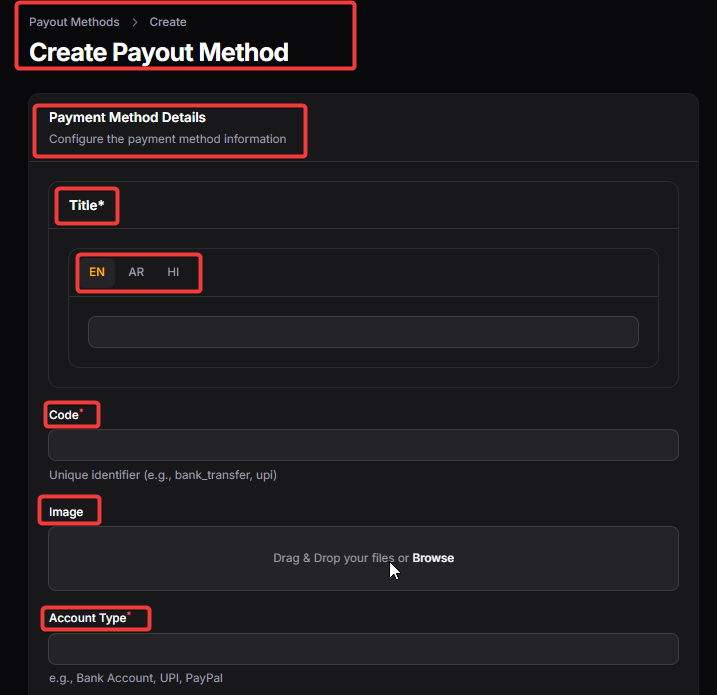

Name : The display name of the payment method (e.g., PayPal, Bank Transfer, Wallet).This is what users see while requesting withdrawal.
Code :A unique internal identifier for the payment mode.Used by the system to process and differentiate payout types programmatically.
Image : Icon or logo of the payment method.Improves user interface clarity and quick recognition.
Account Type : Defines the data format required (e.g., text, number, email).Ensures correct validation of user-entered payment details.
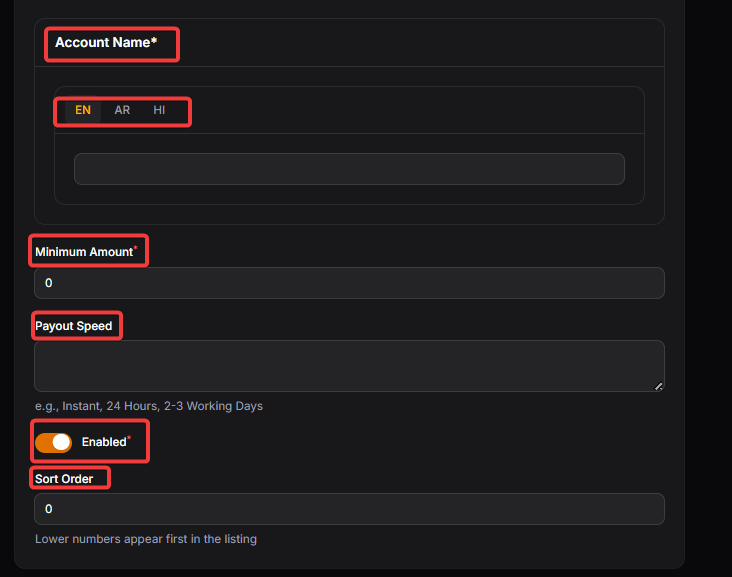
Account Name : Label shown to users for entering their payout details (e.g., Account Number, PayPal Email).Guides users on what information to provide
Minimum Amount : Standard minimum withdrawal amount after the first payout.Prevents very small payout processing.
Payment Speed: Indicates estimated processing time (e.g., 1 Day, 3 Days).Sets user expectation for payout timeline.
Enabled : Activates or disables the payment method.Disabled methods are hidden from users during withdrawal.
Sort Order: Lower numbers appear first in the listing.
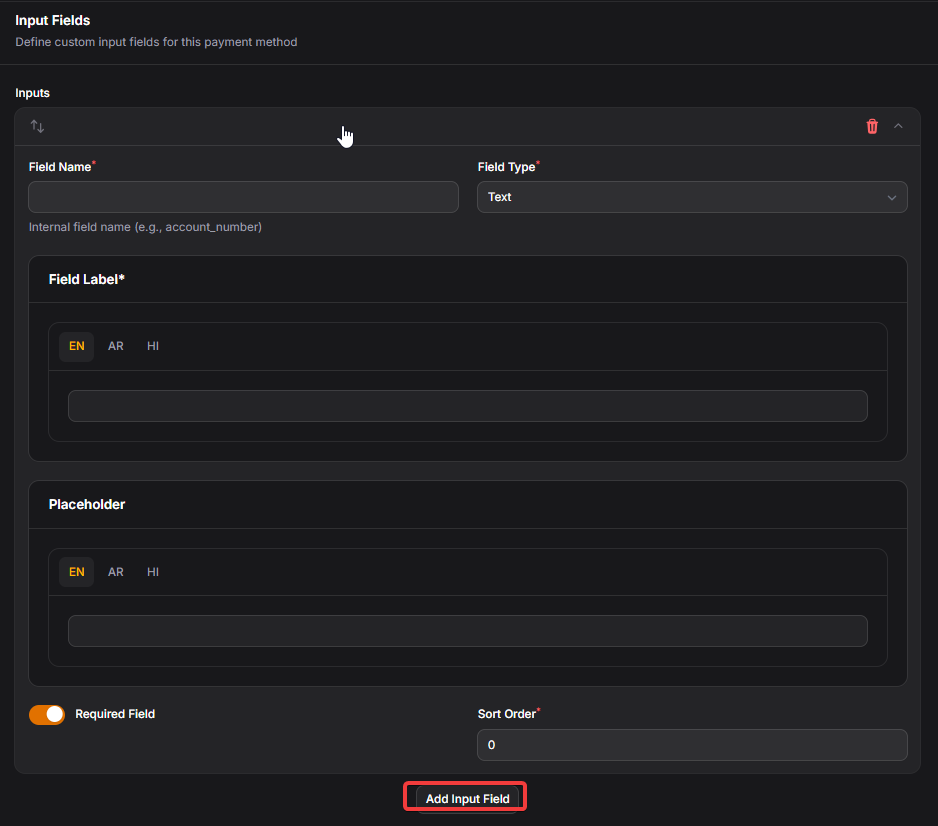
Payment Mode Input Fields :
This section defines the custom input fields required from users when selecting this payout method.
Field Name: Internal field name (e.g., account_number).
Field Type – Input format (Text, Number, Email, Select).
Field Label – What users see on the form.
Placeholder – Example input to guide users
Required Field – Ensures mandatory data collection
Sort Order: Lower numbers appear first in the listing.