This guide walks you through installing the application using the built-in web installer. No technical knowledge is required—just follow each step carefully.
Before You Begin
Make sure your server is ready:
Server Requirements
Requirement |
Minimum |
|---|---|
PHP Version |
8.2 or higher |
PHP Extensions |
PDO, Mbstring, OpenSSL, cURL, JSON, Fileinfo |
Writable Directories |
|
Database |
MySQL 5.7+ or MariaDB 10.3+ |
Required Details
Keep the following ready:
CodeCanyon Purchase Code
-
MySQL Database (created in hosting panel)
DB Name
Username
Password
Host (usually
localhost)
Open Installer on Live Domain
Upload files to your server (inside
public_htmlor your domain root).Open your browser and visit:
https://my-domain.com/installYou will be redirected to the installer.
Step 1: Server Requirements Check
The system will automatically check your server.
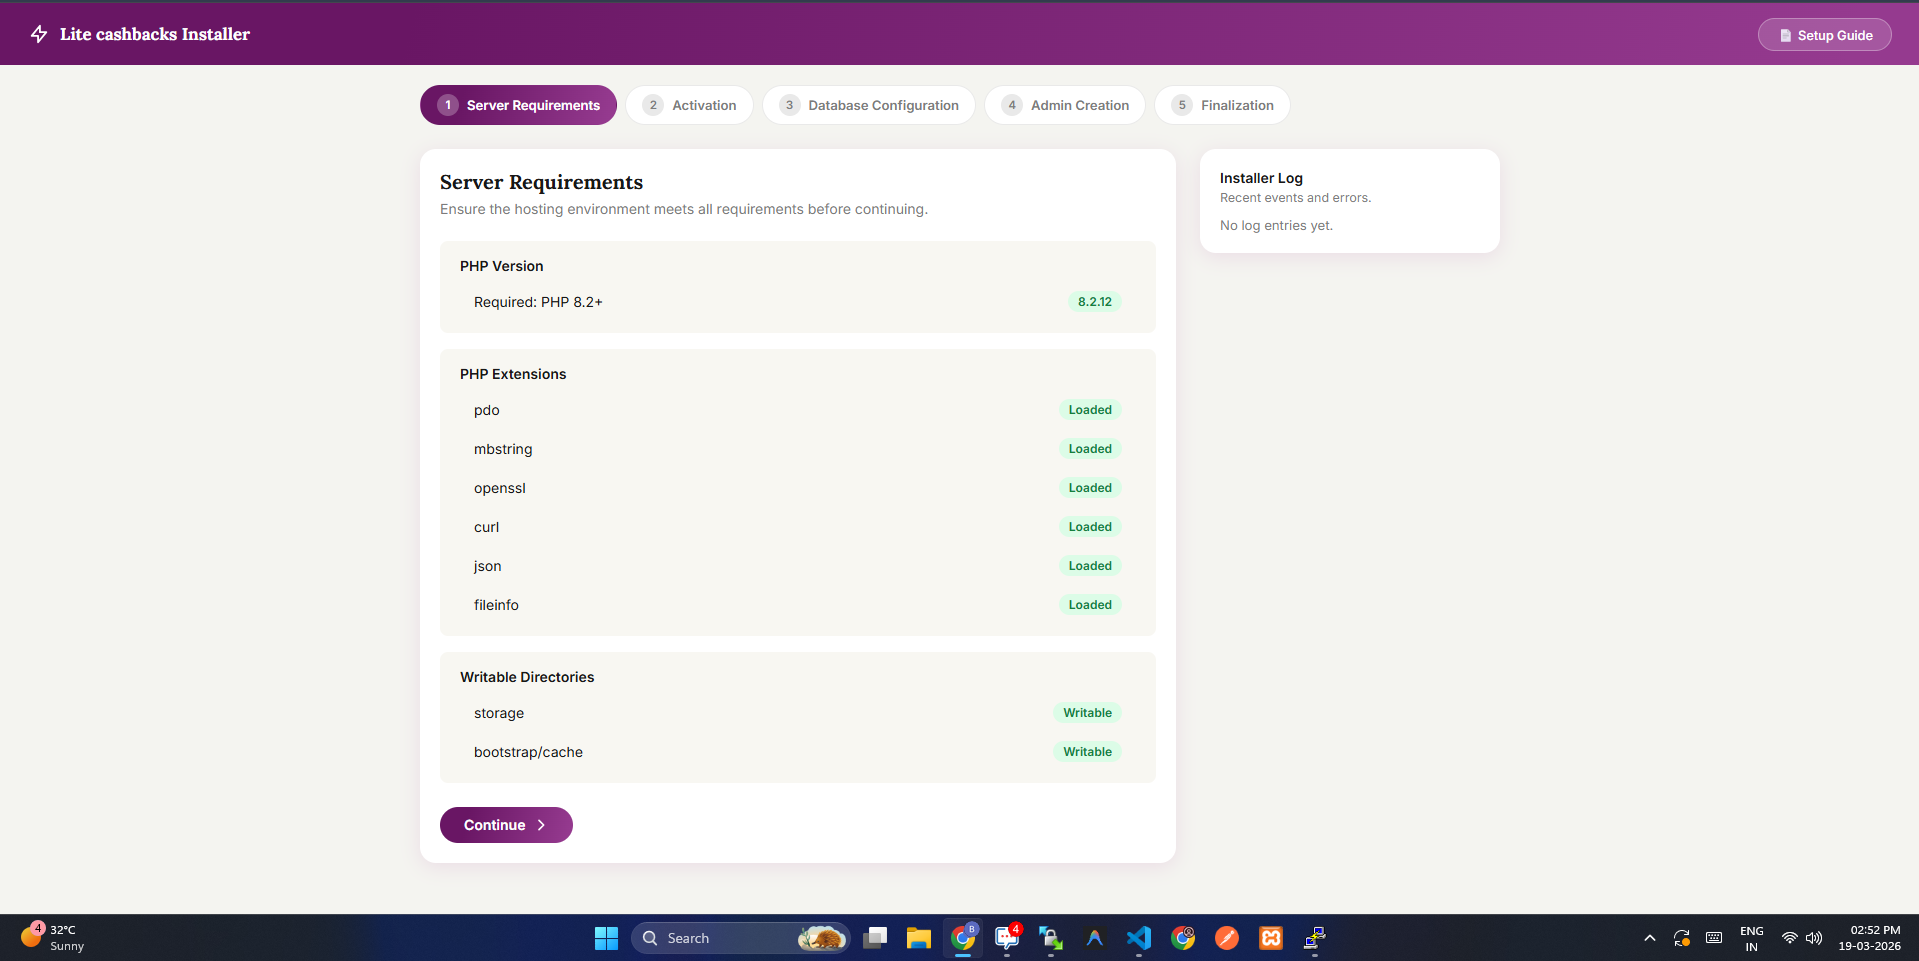
If everything is right:
Click Continue
If something is missing:
Enable missing PHP extensions from hosting
-
Set permissions:
storage/→ 755 or 775bootstrap/cache/→ 755 or 775
Click Re-check Requirements
Important: Do NOT proceed until all checks are validate.
Step 2: Activation (License Activation)
Enter your license details:
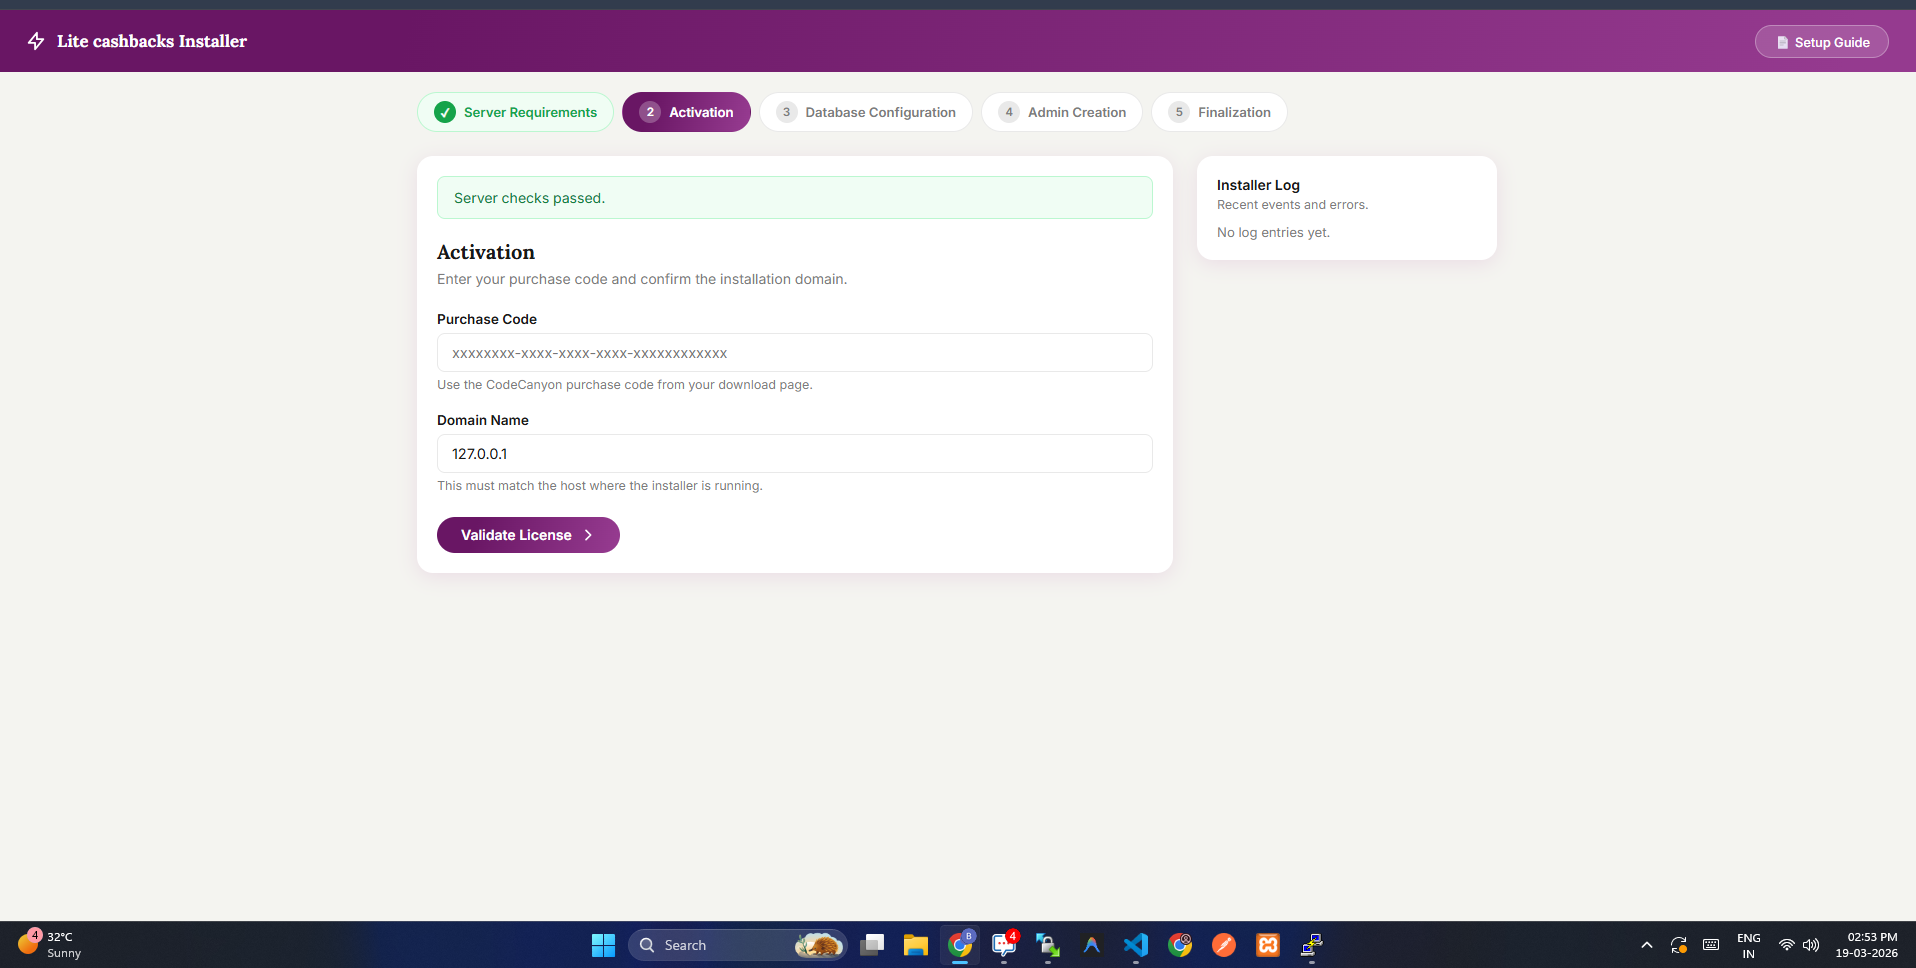
Field |
Description |
|---|---|
Purchase Code |
From CodeCanyon |
Domain Name |
Auto-filled or if not then add manually via copy from url |
Click Validate License
Where to Find Purchase Code
Login to CodeCanyon
Go to Downloads
Click Download → License Certificate
Copy the purchase code
License is tied to your domain.
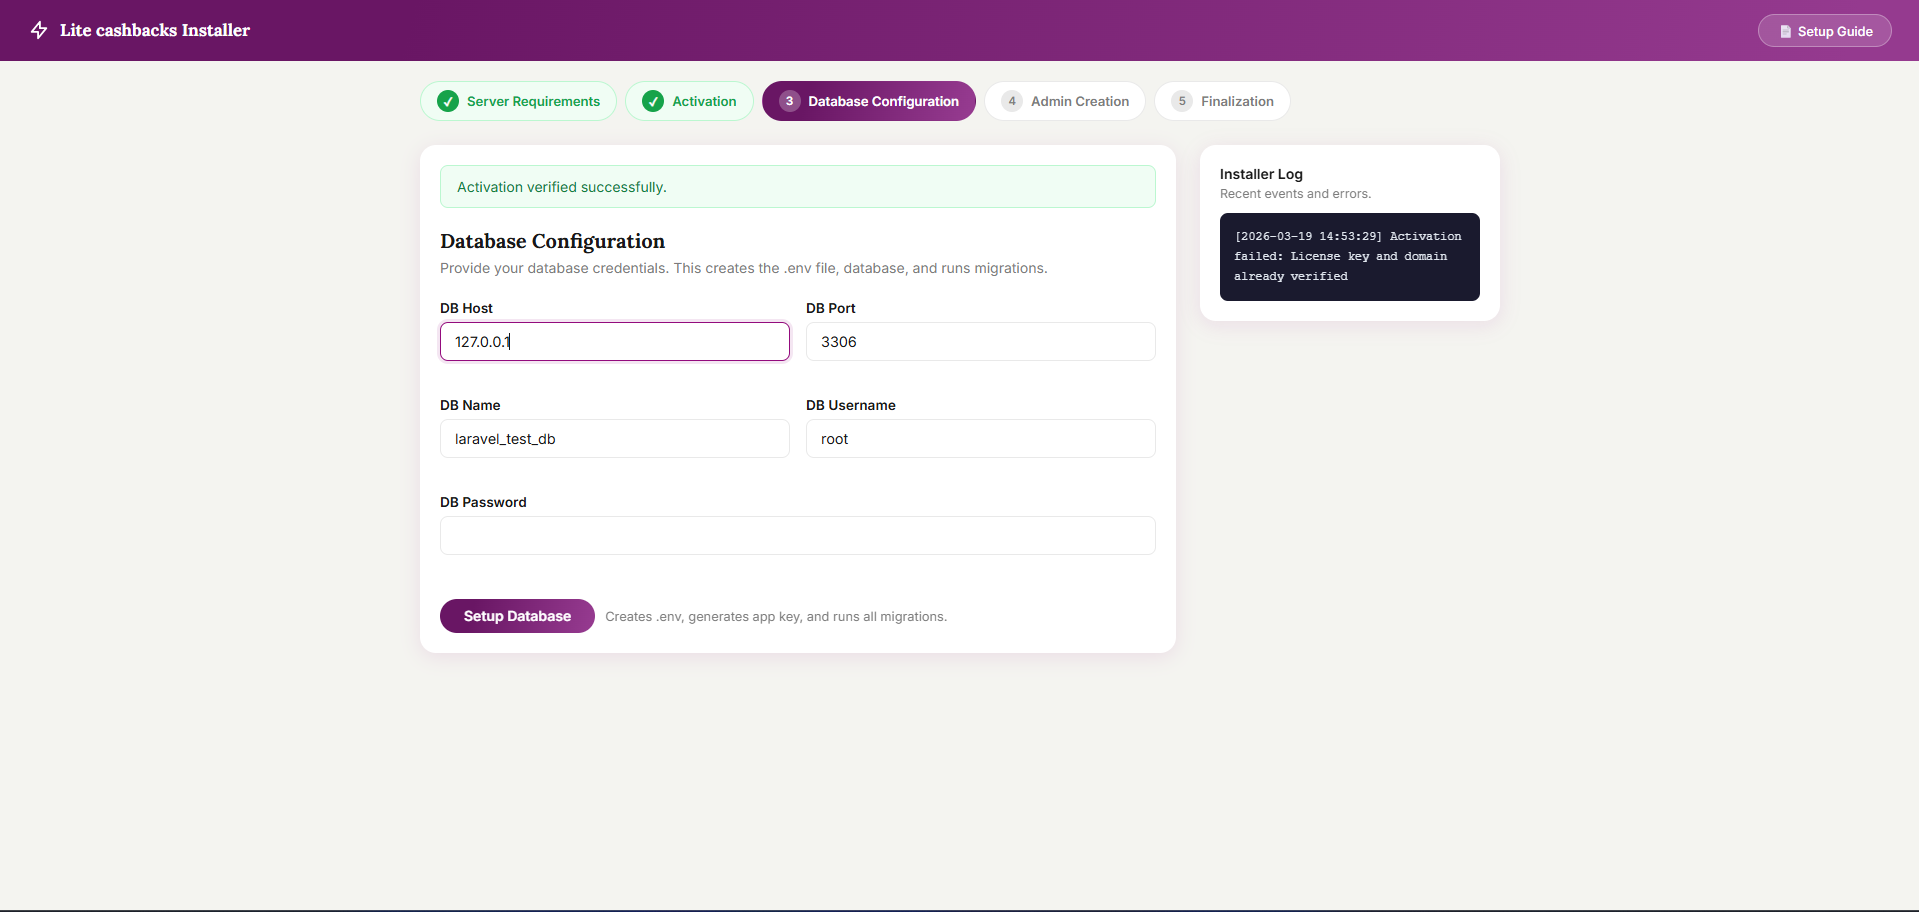
Step 3: Database Configuration
Enter your live database details:

Field |
Example |
|---|---|
DB Host |
|
DB Port |
|
DB Name |
|
DB Username |
|
DB Password |
Your DB password |
Click Setup Database
What Happens
Database connection is verified
.envfile is createdApp key is generated
Tables are created
Step 4: Admin Creation
Fill in your admin details:
Field |
Description |
|---|---|
Full Name |
Your name (ex. admin/master admin) |
Login email (ex. [email protected]) |
|
Password |
Minimum 8 characters and must be strong password |
Confirm Password |
Re-enter password |
Click Create Admin Account
Step 5: Finalization
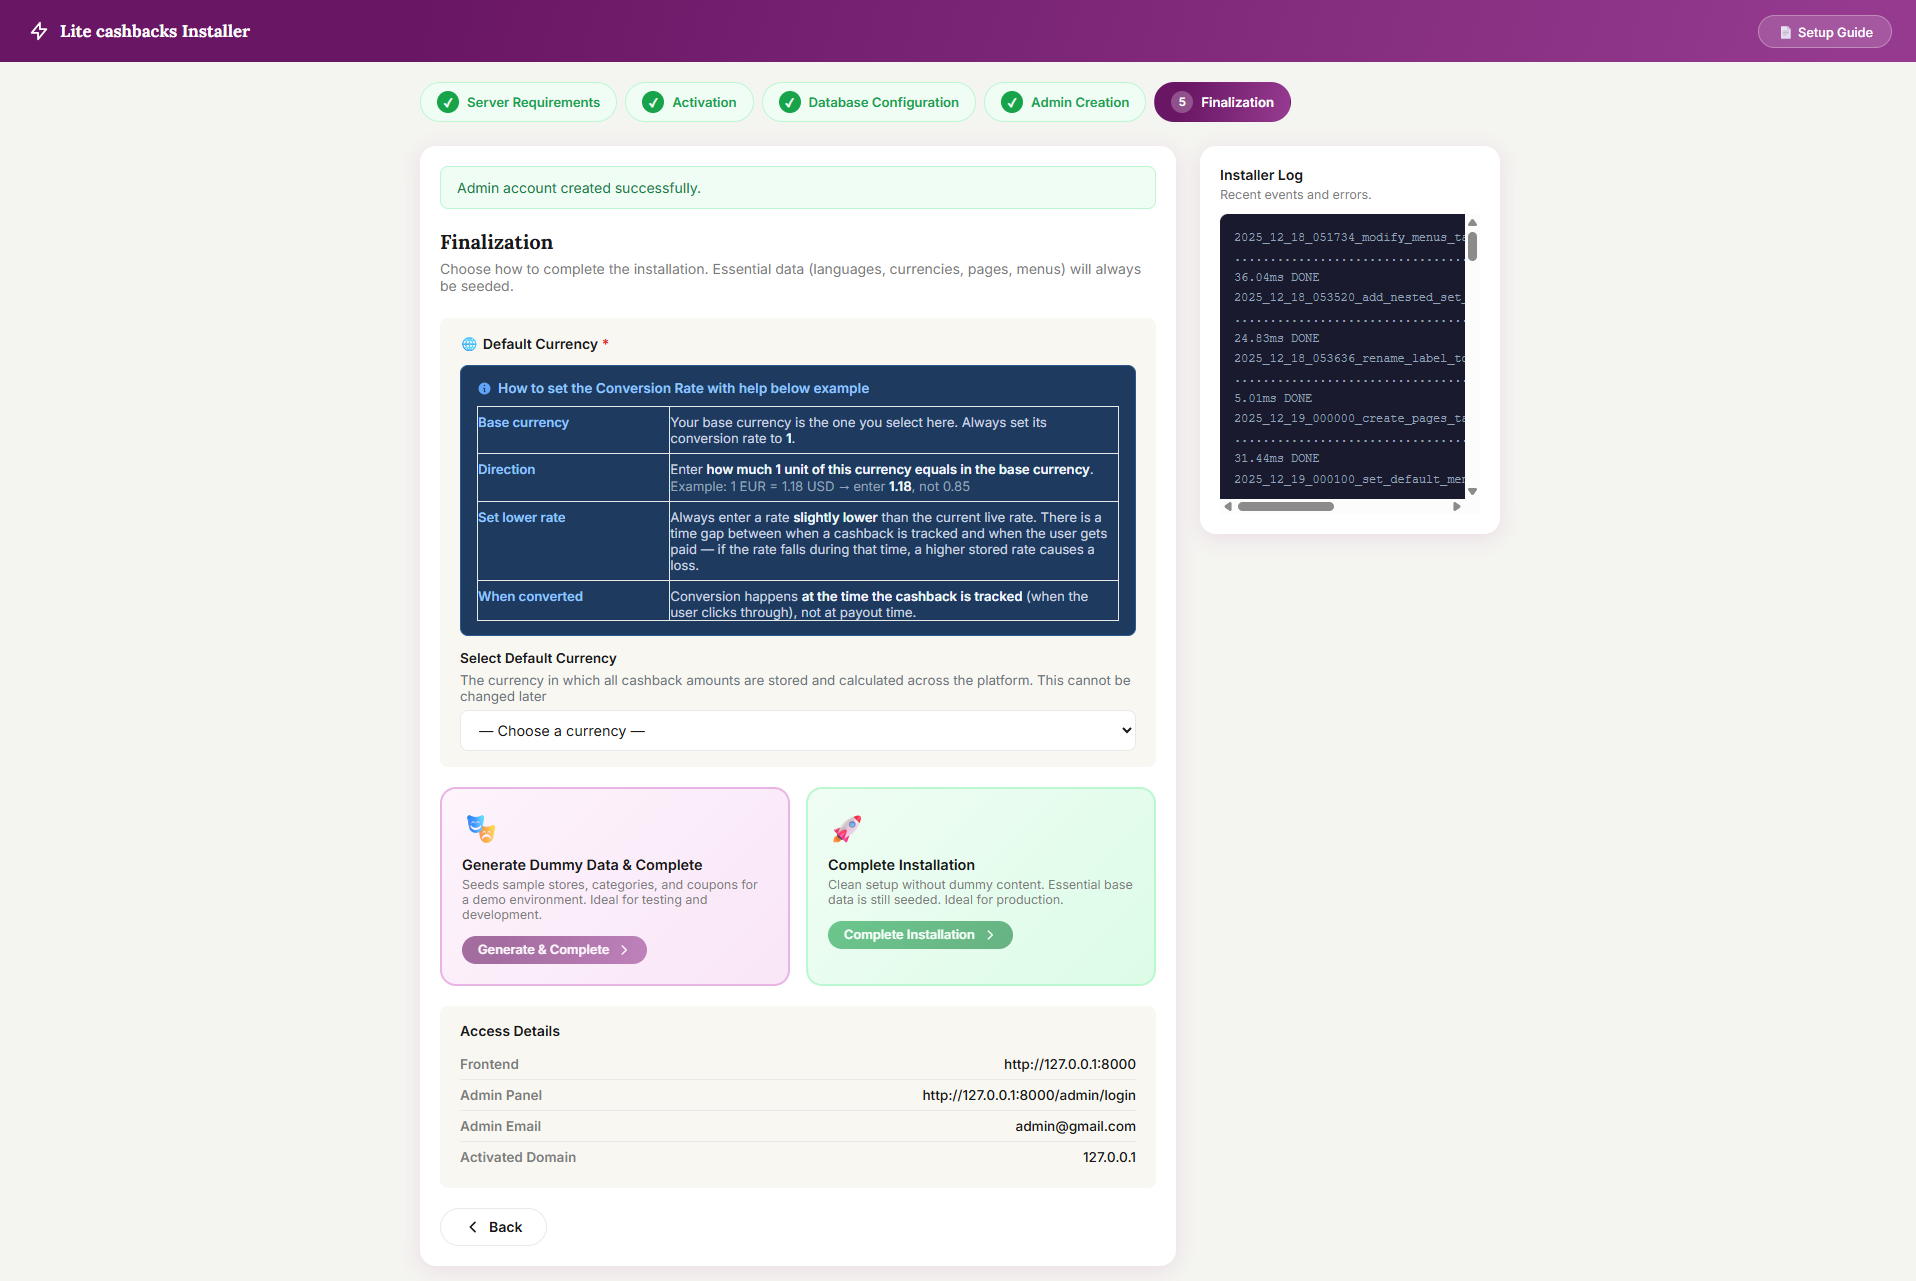
Select Default Currency
Choose your base currency carefully. This cannot be changed later.
Currency Rules
Base currency =
1-
Other currencies = conversion rate
Example: 1 EUR = 1.18 USD → enter 1.18, not 0.85
Use slightly lower rates for safety
Conversion happens at tracking time
Choose Installation Type
Generate Dummy Data
Adds demo content
Best for testing/demo
This action will be add dummy data for categories, networks, store, coupon and offers.
Complete Installation
Clean setup
Best for live websites
Click your preferred option to finish.
Once the installation is complete its auto redirect on admin URL https://my-domain.com/admin. then you can proceed with your admin credentials which created in "Admin Creation" Step.